Short Course on
Telescopic Rods
1. If you’ve just gotten a rod, and happened to unscrew the grip plug and all the pieces fell out, gather all the pieces and go sit at a table. Sort the pieces so that they are all pointing the same way. Most rods have either a painted area near the tip end of each section, or a ring painted around the section near the tip end. Additionally, the butt end of each section will be unpainted and a dull gray color. Then sort them by size, from the thinnest to the thickest. Insert the tip section, lillian cord first, into the dull gray (butt) end of the next larger section. Then insert the tip end of that one into the butt end of the next larger section, and so on. In every case, the sections should just slide in as if they belonged there (after all, they do). You should not need to use any force whatsoever. If a section does not just slide in all the way with no force whatsoever, it is probably being put in backwards. Don’t push! Take it back out and put it in properly. If you force it in, it will become permanently jammed!
Do not leave a rod where a child can play with it. Boys in particular like to take things apart. They don’t always get them back together properly. (I was a boy once, I speak from experience.)
More than once, I have been asked to replace rods that
mysteriously arrived “broken.” I examine every rod before it is mailed, and
they all extend and collapse perfectly. Rods do not leave here broken. If a rod
is taken apart and reassembled improperly, it is not a manufacturing defect and
it is not a warranty issue. Jammed rods will not be replaced.
2. Extend the rod one segment at a time, starting with the tip section and seating each segment until it is just slightly snug – not tight. It is best not to do this under a tree with low branches and absolutely, positively, do not do it indoors in a room with a ceiling fan going. (I know that one from experience.) If you seat the sections too firmly, they could become stuck. If you do not seat the segments firmly enough, it is possible that the top section (or two, or three) can slide back down inside the rod. DO NOT try to collapse the rod to retrieve them. Collapsing the rod when the tip has fallen down inside can either jam the sections together or crack a section. Go sit down someplace and take off the grip cap. Slide the tip sections out the back (and collapse them if need be). Read point 3 below and then collapse the rest of the rod, starting from the section just above the grip section. When the rod is fully collapsed, insert the tip sections into the rest of the rod. Next time, use just a bit more force to seat each section.
3. Please don't hold the rod tip and flex the rod. There is a good chance you'll break it. This is especially embarrassing when you do it in front of skeptical fishing buddies in an attempt to show them how flexible the rod is. The rod really is extremely flexible, but it finds it's own flex. If you hold the rod tip, you are likely to force it to flex in a much tighter arc than it would take on its own with a fish on the line. The rod is designed to spread the flex over the full length of the rod. It can't do that if you are holding the rod in one hand and the rod tip in the other.
4. When collapsing the rod, start with the section just above the grip, and do one section at a time. To collapse the rod, place the rod butt against your waist and wrap the fingers of both hands around the end of the grip section. With your thumbs and forefingers, grip the next section just past where it extends from the butt section. PULL the section into the grip. Do not grab the section far away from the grip and try to push it into the grip. DON’T DO IT. (Guess how I know that.)
5. A graphite rod is a very long, very effective lightning rod. DO NOT FISH DURING A THUNDERSTORM. At the first hint of lightning or thunder collapse the rod and get out of the water IMMEDIATELY. Similarly, be very careful around power lines. Your rod will conduct electricity.
6. When taking the tip plug off, pull it straight out from the rod, not to one side. WATCH as you are doing this. The lillian or the rod tip can get stuck on the tip plug and come out with it. If you get distracted and look away while pulling the tip plug out and to the side, if the tip comes out with it you can break the tip very easily. (I know because it has happened to me.)
7. Put the tip plug where it can’t get lost. If you put it in a pocket from which you will have to get other things during the day, it is very easy to lose the plug. (I know that one from experience, too.)
8. Before you start fishing, and again at lunchtime, check to make sure the screw cap at the end of the grip section is snug. I’ve never lost one, but I’ve had a few that were just a few casts short of going swimming.
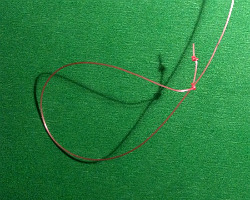
9. To attach the level line, first tie an arbor knot in the end of the level line. Hold the rod between your upper arm and your side and tip the rod down so that just the red cord (lillian) is exposed. Insert the lillian through the loop of the arbor knot twice. Make sure that the rod tip does not extend past the end of the grip section while doing this. With the lillian through the loop twice, hold the end of the lillian and the end of the rod tip between your thumb and forefinger of the arm that is holding the rod pinned to your side. Your middle finger, ring finger and pinkie support the end of the grip section. With the lillian and rod tip secured so neither one can move, pull on the main part of the line to tighten the arbor knot around the lillian. It should be pretty snug. Done correctly, it will not slip at all. If you have use level line and if you attach the line as described above, you do not need to have a knot in the end of your lillian. Yeah, I know everyone else does. You only need the knot if you are going to use furled lines or the tapered MIDI lines, which come with a braided loop for attaching the line to the lillian, or if make your own horsehair lines.
10. Do not lay the rod down on a sandy surface, or touch any section above the grip with sandy hands. The sand will get inside the rod the next time you collapse it, and it will scratch it badly. (Experience.)
11. When you get your back cast snagged in a tree or bush (notice I said when, not if) DO NOT try to free it by whipping the rod to jerk it out. There is a much better chance of breaking the rod than actually freeing the fly. If you can reach the line by collapsing the rod, collapse the rod and pull back on the line to either free the fly or break the tippet. If you cannot reach the line by collapsing the rod point the rod tip directly at the snag and pull straight backwards until the fly is freed or the tippet breaks. This is one of the main reasons to use light tippet. I’ve never heard of a rod breaking while doing this, but a number of people have had the lillian pulled off the rod.
12. Do not set the hook as you have always done with your fly rod. The tenkara rod is much longer, so the same movement at your wrist makes a much greater movement at the rod tip. When fly fishing, you might have 30’ of line stuck in surface tension, and lots of slack to try to achieve a drag free drift. When striking you have to pull all that line off the water and pull out all that slack before the fly moves the ½” necessary to set the hook. With a tenkara rod, your line is short and very light, it is not caught in surface tension and there is virtually no slack. You don’t have to move the rod tip hardly at all to move the fly ½”. If you set the hook as hard as you have always done you will eventually break a rod. Strike quickly, but with little movement and little force.
13. If you are going to walk through the woods, collapse the rod first. This is one of the primary advantages of a telescopic rod. Take advantage of it. I would recommend putting the tip plug back in. If you are going to be driving to your next spot rather than walking, definitely put the tip plug back in. If the rod rolls around in your car the tip can come out and get broken pretty easily.
14. To take the line off the rod, again hold the end of the lillian and the tip of the rod so they cannot move, with your fingers around the end of the grip section to support everything. Pull on the tag end of the arbor knot. The loop in the arbor knot should loosen so that you can remove it from the Lillian.
15. After you’ve collapsed the rod, put the tip plug in the end.
16. At the end of the day, after you are back home, take the screw cap off the butt end of the rod and slide out the individual sections so they can dry. Even water from your line somehow finds its way into the rod and it is best to open it and allow it to dry after each use. Be sure to put the rod sections somewhere that they cannot be bent and where nothing heavy will be put on top of them. Please reread point #1 Be sure the pieces are put back together properly. Use no force! They should slide back together just like they belonged that way.
If you never take the rod apart to dry, it will start getting a bit funky smelling, and will be more likely to get stuck sections. If you put away a wet rod it can ruin the finish. I have seen one and heard of several others. Take it apart and let it dry. This is why you don’t want a knot in the end of the lillian. If you have a knot you will not be able to remove the tip section from the #2 section.
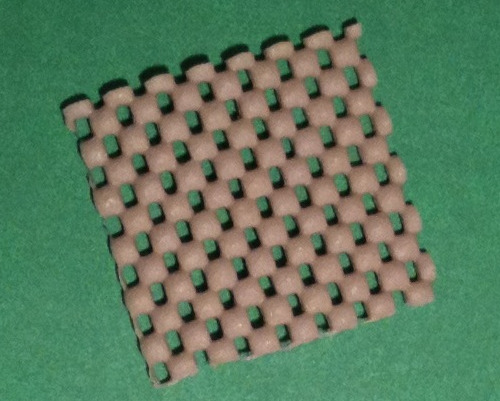
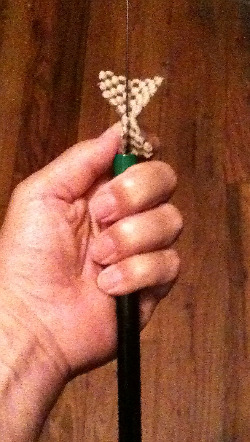
17. If you get a stuck tip, Plan A is to use a Tip Grip (which I will have sent you if you bought the rod from me). If you have bought your rod elsewhere, ask for a Tip Grip with your next order. To use a Tip Grip, place the rod butt snug against your waist and wrap the last three fingers of your left hand around the front end of the butt section. With your thumb and first finger, wrap the Tip Grip around the stuck piece. The edge of the Tip Grip should be just touching the end of the butt section. Your thumb and first finger should be at about the middle of the Tip Grip. Squeeze tightly - but not so tightly that your squeeze bends the stuck section.
Wrap your right hand around the left, with your right thumb and forefinger squeezing the Tip Grip and stuck section just above (and touching) your left thumb and forefinger. Be absolutely certain that the grip of your two hands does not bend the stuck section.
To collapse the stuck section, just pull straight back towards your waist with both thumbs and forefingers. Because your grip on the stuck section is only about a half inch above the butt section, there is little chance of putting too much sideways pressure on the stuck section as long as you are very careful that your right thumb and forefinger and your left thumb and forefinger are in perfect alignment, and you carefully and consciously pull straight back.
18. If the Tip Grip won’t free the stuck section, Plan B is to use a rubber band. Do this sitting down at a table. If you have to do it on the stream, do it sitting down on as large and flat a rock as you can find, and use something like your driver’s license/credit card, etc to provide a flat surface that will not chew up the ends of the sections. (DO NOT DO THIS MID STREAM OR SOMEWHERE YOU COULD LOSE YOUR DRIVERS LICENSE IF IT SLIPS!)
Unscrew the grip screw (and put it in a secure place. Remove all the sections that are about the same length, but keep them all together and all collapsed except for the stuck tip. (For some rods, all the sections are about the same length. For others they are graduated, with sections nearer the grip noticeably longer. For this method, you want the ones that are about the same length as the #2 section. At minimum, you must have the two sections that are stuck together and the next larger section. Take a relatively thin rubber band and tie an overhand knot in it around the stuck tip no more than an inch above the top of the collapsed sections when the sections are held vertically, with their butts resting on the table. Pull the knot tight, but only by pulling on the two ends (loops) of the rubber band, making sure that you do not bend the tip section one way or the other. Do not use an old rubber band that is likely to break, and grip each loop of the rubber band near the tip section, so if it does break it won't snap the rod tip sideways.
Pull one end (loop) of the rubber band straight down and hold it against the collapsed sections. It needs to be under tension but not strained to near breaking.
While holding the end of the rubber band tight against the collapsed sections, with the sections vertical, butts resting on the table (or driver’s license), pull up on the stuck section (the section it is stuck into will come with it). Let go of the stuck section. The rubber band will snap it down so that it hits the table. The larger sections are there to provide lateral support and make sure the stuck sections don't bend and break. Pull the stuck section up and let it snap down as often as it takes (you may have to retighten or reposition the rubber band). The sharp jolt as the sections hit the table should eventually free the stuck section.
This method has a higher likelihood of working than using a Tip Grip, but the Tip Grip does not require taking the rod apart and finding a flat spot or risking breaking the tip as you tighten the rubber band. It is simpler and sometimes it works. Try it first.
If by chance the stuck section is #2 stuck in #3 but the tip isn't stuck, remove the tip to a safe place before using the rubber band to free the stuck section.
19. Do not leave your rod in a car parked in the sun on a
summer day. Even if your rod fits in the glove compartment, don't keep it there.
20. And again, do not fish during a thunderstorm.
TenkaraBum Home > Tenkara Rods > Short Course on Telescopic Rods
“The bitterness of poor quality remains long after the sweetness of low price is forgotten” - Benjamin Franklin
"Be sure in casting, that your fly fall first into the water, for if the line fall first, it scares or frightens the fish..." -
Col. Robert Venables 1662
As age slows my pace, I will become more like the heron.
We've all had situations where seriously chewed up flies kept catching fish after fish after fish. It is no sin to tie flies that come off the vise looking seriously chewed up.
Warning:
The hooks are sharp.
The coffee's hot.
The fish are slippery when wet.
Beware of the Dogma
Seriously, all the hooks sold on TenkaraBum.com, whether packaged as loose hooks or incorporated into flies, are sharp - or as Daiichi says on their hook packages, Dangerously Sharp. Some have barbs, which make removal from skin, eyes or clothing difficult. Wear eye protection. Wear a broad-brimmed hat. If you fish with or around children, bend down all hook barbs and make sure the children wear eye protection and broad-brimmed hats. Be aware of your back cast so no one gets hooked.
Also, all the rods sold on TenkaraBum.com will conduct electricity. Do not, under any circumstances, fish during a thunder storm. Consider any fishing rod to be a lightning rod! Fishing rods can and do get hit by lightning!
What's in stock?
Kurenai II AR 30F
Kurenai II AR 33F
Kurenai II AR 39F
TenkaraBum 33
TenkaraBum 36
Furaibo TF39
Furaibo TF39TA
Nissin Oni Tenkara Line

Arbor Knot

Tip Grip

Tip Grip in Use
If you enjoy spin fishing or baitcasting please visit my sister site Finesse-Fishing.com.


